6 Easy Swaps that Make the Holidays Much Healthier (and Just as Delicious)

The holidays come with an abundance of indulgent foods. Think about it: What festive gathering isn’t centered around some decadent treat, elaborate meal, or sweet bite? We often find ourselves binge-eating during this time, which only creates lackluster moods and sluggish brain fog. This season, we would like to encourage you to make choices that will keep you feeling lucid, energized, and happy. These simple swaps trade empty calories for dense nutrition without compromising any holiday flavor.  


1. The Classic: Eggnog

The Swap: Brazil Nut Milk with Fresh Nutmeg

IMG_9879 (1).jpg

Most eggnogs are made of raw egg, loads of sugar, heavy cream, bourbon, and nutmeg. (If we handed you a handful of sugar to eat you would probably politely decline, but that’s essentially what you’re doing when you drink a cup of eggnog.) Instead, lean into the spicy, creamy goodness of this holiday treat with BrazilNut Milk. Our PrimaFoodie recipe makes the frothiest, creamiest drink. We love to add vanilla extract, cinnamon, and a good dusting of fresh nutmeg to ours. You’ll never miss the Nog.


2. The Classic: Mashed Potatoes 

The Swap: Parsnip Purée

IMG_8736.jpg

 Mashed potatoes are usually a highlight on any holiday table. Unfortunately, they are filled with butter and heavy cream and very little nutrition. On top of that, potato is a high glycemic food that essentially turns into sugar when digested by the body. You can still get that creamy starch with parsnips. This low-glycemic root vegetable is just as satisfying with roasted meats, gravy, and all the fixings. (Plus it’s approved for SIBO and Low FODMAP diets.)


3. The Classic: Pasta

The Swap: Spaghetti Squash, Celeriac Noodles, or Zucchini Noodles

IMG_4651.jpg

The highlight of a good pasta dish is usually the al dente texture of the pasta and the flavor of the sauce. When cooked just right, a thin “zoodle” made from squash, celeriac, or zucchini noodle still gives you that pasta bite while being a healthy vehicle for your Italian gravy.  


4. The Classic: Starbucks Chai Latte

The Swap: PrimaFoodie Chai Latte   

IMG_3577.jpg

For some, Starbucks is everything. But we simply cannot stand by them when they douse their lattes with milk and simple syrups filled with sugars, corn syrups, and added preservatives. The PrimaFoodie Chai uses smooth brazil nut milk, and delightful—and healthy—spices.


5. The Classic: Milk Chocolate

The Swap: Dark Chocolate  

For those on SIBO and Low FODMAP diets, milk chocolate is a big no. Swapping that for 100 percent cacao raw chocolate can satisfy your chocolate craving without the added milk and sugar. Plus, raw cacao is rich in antioxidants and minerals. We melt ours down with a bit of local honey and some coconut oil to make our chocolate almond butter cups, dip fruit, homemade marshmallows, and biscotti.

6. The Classic: Bread

The Swap: Macadamia Nut Bread

IMG_2703.jpg

Trust Nichole when she says: You can survive the holidays without gluten. Here’s one way: Make the PrimaFoodie Macadamia Nut Bread. Toast and spread a thick layer of homemade jam on top. It also makes for a quick dessert with a little raw cocoa dusting.


Creamy Parsnip Purée

Ghee and coconut milk complement the natural creamy flavor of the parsnips, which is one of our favorite root vegetables. As indulgent tasting as it is, this dish is much lighter than traditional potato purée while also being SIBO-friendly and low FODMAP. A comforting side that goes well with slow-cooked meats and vegetables, as well as juicy roast chicken.

This recipe yields 6 servings


INGREDIENTS

  • 1 pound parsnips
  • 10 ounces coconut milk
  • 2 teaspoons garlic or 2 large garlic cloves, minced
  • 1 tablespoon sea salt
  • 1 tablespoon ghee
  • 0.5 kilograms parsnips
  • 15 ml coconut milk
  • 2 teaspoons garlic or 2 large garlic cloves, minced
  • 1 tablespoon sea salt
  • 1 tablespoon ghee

Directions

  1. Peel parsnips and cut them in thirds. 

  2. Add a small amount of water to the bottom of a pot and bring to a boil. Add parsnips to a steamer basket above the boiling water and allow them to soften until they can be easily pierced with a fork.

  3. When cooked, remove steamer basket from pot and drain water. Add parsnips into the pot.

  4. Add coconut milk, garlic, sea salt, and ghee. Using an immersion blender, mix all the ingredients until the consistency is creamy and smooth.

  5. Serve as a side dish or as a spread under a braised meat dish, such as beef brisket.


Tips

**For those following a SIBO diet, omit the garlic and instead add fresh herbs such as rosemary and thyme.

**Depending on the size of parsnip, you may need to add more coconut milk to get a creamier consistency. 

**A food processor or a high-powered blender like a Vitamix can be used instead of an immersion blender.


Almond Biscotti with Honey and Orange

There’s something about the robust crunch, the warm anise, and the buttery almond that make biscotti so satisfying. These have all the appeal of the traditional twice-baked Italian biscuit but without the refined sugar or gluten. Cozy up with a few of these fresh from the oven, a piping cup of tea, and a novel.  

This recipe yields 20 pieces of biscotti


INGREDIENTS


  • For Biscotti:
  • 2 eggs
  • ¾ cup honey
  • ½ cup palm shortening
  • 2 tablespoons orange flavoring
  • 2 cups almond flour
  • ¼ cup coconut flour
  • ¼ cup arrowroot powder
  • 3 teaspoons star anise, freshly ground
  • 1-½ teaspoons baking powder
  • 1/4 teaspoon salt

  • For Topping:
  • 1 bar 100% cacao or unsweetened baking chocolate
  • 2 tablespoons honey
  • 1 tablespoon coconut oil
  • 2 cups sliced almonds or crushed pecans

  • For Biscotti:
  • 2 eggs
  • 175 ml honey
  • 64 g palm shortening
  • 2 tablespoons orange flavoring
  • 250 g almond flour
  • 32 g coconut flour
  • 32 g arrowroot powder
  • 3 teaspoons star anise, freshly ground
  • 1-½ teaspoons baking powder
  • 1/4 teaspoon salt

  • For Topping:
  • 1 bar 100% cacao or unsweetened baking chocolate
  • 2 tablespoons honey
  • 1 tablespoon coconut oil
  • 250 g sliced almonds or crushed pecans

DIRECTIONS

For Biscotti:

  1. In a stand mixer, combine eggs, honey, palm shortening, and orange flavoring until well incorporated.

  2. In a separate bowl, combine all dry ingredients and use a pastry blender or whisk to mix and break up any lumps.  

  3. Slowly add the dry ingredients to the wet mixture.

  4. On a baking tray covered with parchment paper, form the dough into a log shape. The dough will spread when baking, so keep the log thin and approximately 3 inches wide. 

  5. Bake at 350 degrees Fahrenheit / 175 degrees Celsius for 30 minutes.

  6. Remove from oven and let cool for 1 hour. 

  7. Slice into thin strips and lay flat on the baking tray. 

  8. Reduce the heat of the oven to 200 degrees Fahrenheit / 90 degrees Celsius and bake for another 45 minutes, flipping the biscotti halfway. 

  9. Remove from oven and allow to cool and harden. 

For Topping:

  1. In a double boiler, melt baking chocolate. 

  2. Add honey and coconut oil and mix well. 

  3. Prepare a bowl with sliced almonds or crushed pecans.

  4. Once fully melted, dip ends of biscotti in chocolate and roll through nuts. Set back on baking tray and refrigerate until the chocolate has hardened. Serve with your favorite cup of coffee. 


TIPS

**The dough will be very sticky and does not feel like a traditional dough; this is normal. You can form the log shape inside the parchment paper without even touching the dough. Pinch two sides of the parchment together and roll the dough back and forth inside the parchment. Release and check that it’s about 3 inches or desired width.

**After the second bake, it is normal for the biscotti to still feel slightly soft. It will harden into the traditional crispy texture after sitting at room temperature for a while. 


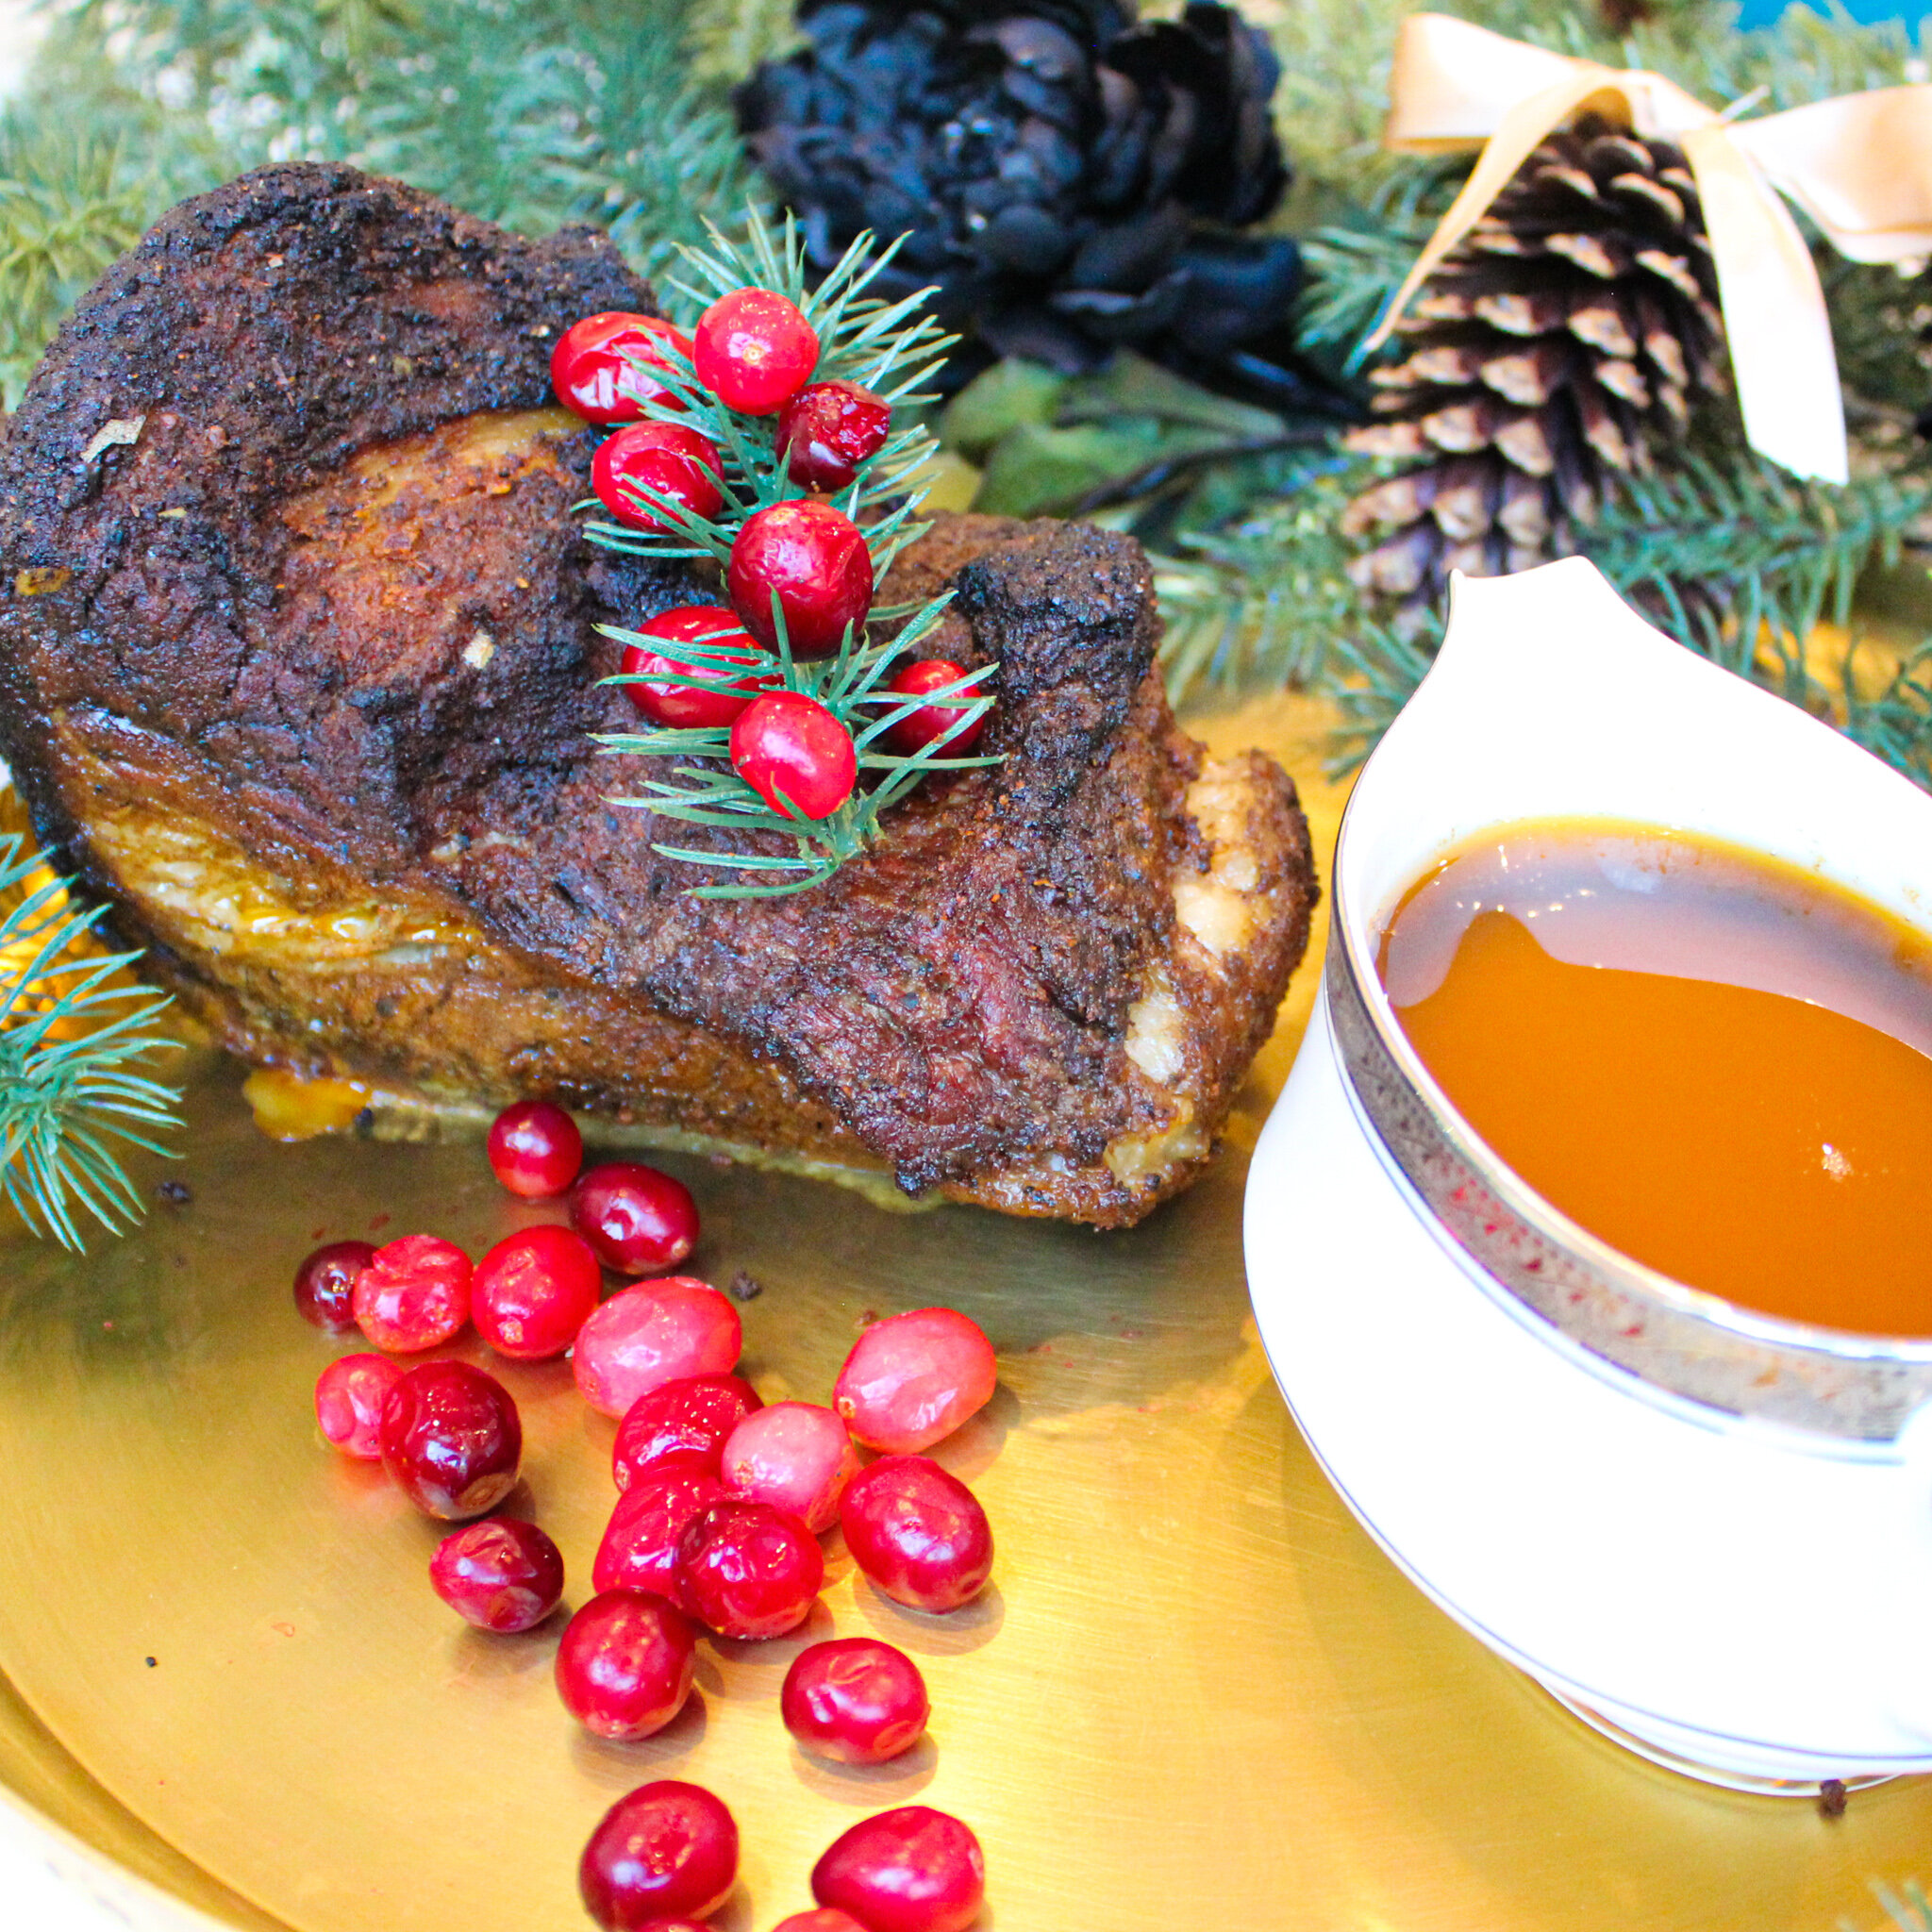
4-Hour Beef Brisket with Sweet and Savory Dry Rub

Cooking brisket can be intimidating, but the secret is time and patience. You’re about four hours away from tender, juicy, flavorful meat. The dry rub encourages a mix of hearty flavors: Coconut sugar coaxes the beef’s sweetness, while mustard and bay leaf encourage the savory notes. Trust us when we say you’ll be asked to make this over and over again.


This recipe yields 6 servings


INGREDIENTS

  • 3-½ pounds brisket, trimmed
  • 2 tablespoons paprika
  • 2 tablespoons chili powder
  • 2 tablespoons kosher sea salt
  • 1 tablespoon coconut sugar
  • 1 tablespoon garlic powder
  • 1 tablespoon onion powder
  • 1 tablespoon black pepper
  • 2 teaspoons dry mustard
  • 1 bay leaf, crushed
  • 1-½ cups beef stock or bone broth
  • 1.5 kilograms brisket, trimmed
  • 2 tablespoons paprika
  • 2 tablespoons chili powder
  • 2 tablespoons kosher sea salt
  • 1 tablespoon coconut sugar
  • 1 tablespoon garlic powder
  • 1 tablespoon onion powder
  • 1 tablespoon black pepper
  • 2 teaspoons dry mustard
  • 1 bay leaf, crushed
  • 240 - 355 ml beef stock or bone broth

DIRECTIONS

  1. Preheat oven to 350 degrees Fahrenheit / 175 degrees Celsius.

  2. Combine all ingredients except beef stock or bone broth to make dry rub.

  3. Season the brisket on all sides with dry rub.

  4. Place brisket in roasting pan and cook uncovered for 1 hour.

  5. Remove pan from oven and add stock to pan. Add more stock or water, if necessary, to keep the bottom of the pan covered but create no more than ½ inch of liquid.

  6. Lower oven to 300 degrees Fahrenheit 150 degrees Celsius, cover pan, and continue cooking for 3 hours. Brisket is ready when it’s fork-tender.

  7. Trim the fat and slice meat thinly against the grain. 

  8. Using a fat separator, de-fat the pan drippings and serve over the brisket.


TIPS

**For a thicker, richer jus, transfer the remaining liquid to a skillet and reduce (on low boil) to desired consistency.

**If the brisket feels springy and requires a sharp knife to cut it using a sawing motion, it’s not done. Cover it back up with foil and put it back into oven for another 20 minutes and test, again. 


Why Women Need to Make their Voices Heard

Several years ago, I began to notice a troubling trend in my daughter’s preschool classroom. My daughter, who had always been bright, opinionated, and decisive, began to shrink and silence herself. I watched as the boys would shout their answers while she would sit quietly with her arm raised, choosing to follow the rules rather than compete for her voice to be heard. 

This scene was a stark image of the significant imbalance we face in the world. Too many women shrink themselves, quiet their voice, and alter their visions to cater to others. Witnessing this broke my heart. It also lit a fire in my soul. I have work to do—we all have more work to do—to encourage true gender equity in the world.

We see how the cards are stacked against women everywhere. I have seen powerful, smart women stagnate or stall in their careers after taking time to have children. Certainly, we have evolved as a society, and the job of childcare is shouldered by both men and women. However, there still is a significant imbalance, which results in women either downshifting their careers, giving up on their passions, leaving the workforce entirely, or facing significant obstacles and disadvantages when they choose to re-enter the workforce. 

 In 2020 alone, a year that has been marked by significant challenges, women have been disproportionately impacted in the work world, thus facing intense barriers including the loss of jobs and stymied careers. This has an immediate effect on the individual, but also in her family, community, and society at large. When women leave the workforce, it cuts into the future of women leaders.

 It is critical that we change mindset around women’s equity and be advocates for change. We need to take the steps to shift the conversation and put an emphasis on progressing parity. Whether it be starting a business, raising caring children, or pursuing any passion, every woman’s purpose and voice is worthy of being nurtured, honored, and respected. These decisions are what grow our society. Until we have a world that supports every woman's choices rather than penalize them, we need to fight.

 One of the most influential ways to do this is to invest in ourselves. We need to own our dreams and accomplishments. We need to rally for progressive work policies, support female entrepreneurs, offer inclusive maternal leave, and buoy what we truly want each and every day. That is up to us. Quieting our voices doesn’t lead to true change. Pursuing our passions, fighting for our worth, and bolstering our personal agency does.

 By doing this we are doing two giant things: We’re giving credence to our dreams and we’re working to knock down a systemic issue that has, for too long, become central to modern life. It is scary, I know. I have left the workforce, had a child, experimented, and started businesses all facing great precarity. I have experienced ups and downs and weathered huge learning curves. It is hard but it is worth it. I know my voice is worthy. And when I face doubt, I think back to my daughter raising her little hand in class. I want to set the tone for her and all girls that our voices need to be heard.  

 So let’s all go forth, dream big, and evolve the system. We need your voice, and your power. I am here cheering you on.

x PrimaFoodie

Food Protocol Boundaries

5 Ways to Set Boundaries around How You Eat

Boundaries set the stage for positive relationships and healthier lives. There’s freedom when we clearly communicate barriers with others and simultaneously stand by our decisions. This is evidenced everywhere, from parenting to life choices. But here at PrimaFoodie, we’ve found boundaries often get overlooked when it comes to our dietary choices. It can be challenging when our food protocols clash with social engagements or other people’s diets. This is why some clear direction can be helpful.  

  1. Communicate your protocols. Our founder, Nichole, has sometimes felt like a broken record when it comes to telling others about her dietary restrictions. But clear and consistent communication is essential. Whether you’re hosting people or are a guest in someone’s home, always announce your dietary needs well ahead of time (at least two days prior). It can be as simple as, “I am dairy, grain and sugar free and so is our household” via an email or text.  It’s simple, elegant, and it will put everyone at ease.

  2. Explain expectations for guests. After you clearly communicate your dietary needs, make your expectations for others known. It can be quite clear and direct, such as “please do not bring any dairy, gluten, or refined sugars into our home.” Or it can be more open and flexible like, “if you choose to bring any food, please label exactly what it contains, such as wheat or dairy.” These expectations are important because as common as restrictive diets are these days, conversations around them are still lacking.

  3. Call ahead about the menu. When Nichole receives an invitation, she always calls ahead to alert the host and ask if the menu can be sent in advance. From there, she knows what she can and cannot eat. If there are things of concern, you can request a swap or change, such as: “Would you please hold the sauce or breadcrumbs? Or save a chicken breast on the side for me?” These are easy solutions in the kitchen and require little effort from your host to ensure you can enjoy the party.

  4. Address gifts. No one wants to show up empty handed. But no one wants to show up with a gift that interferes with your health. For generous guests who insist on bringing gifts, it’s helpful to tell them exactly what to bring: flowers. It’s one simple, loving gift that will avoid any health issues or conflict.

  5. Inquire about other health measures. Nearly all of 2020 has involved navigating a global pandemic. With this has come a varied mix of people’s opinions about safety. While everyone’s decisions are personal, they inevitably impact others. When hosting, announce your sentiments around safety beforehand—i.e. “There will be no more than nine guests present. Dinner will be outside, so please bring a jacket. We request everyone wear masks before and after dinner.” When invited to someone’s home, politely ask about what’s important to you ahead of time.

What we’ve learned over time is that these strategies not only support your health and happiness, but they go a long way in strengthening friendships. Because after all, communication and understanding are the centerpiece of all relationships. And our health deserves to be front and center.

‘Cupcakegate’: What I Learned about Honoring My Boundaries around My Food and Health Choices

Two absolutes in life are food and people. We all have to eat, and we all have to co-exist. But it is more complicated than this. How we choose to eat and the nutrition choices we make can present challenges when we’re with others. As someone who has been on a strict protocol for many years, I’ve experienced how my choices can sometimes cause misunderstandings. This has been a wake-up call about how we all need to practice greater empathy and healthy boundaries when it comes to our health.

 One of my greatest learnings happened a few years ago when my friend, Rachel, stayed at our house. Rachel and I knew each other well. Our children played together frequently, and I told her all about my health journey and how I was following a food protocol. By all accounts, we were well informed about each other’s lives. 

 At the time, I had been on the SIBO Diet for seven months, and I was working extremely hard to heal myself of various ailments. To achieve this, I was abstaining from a wide variety of foods, including grains, complex carbohydrates, and any processed sugar. I had made progress, and was feeling better and healthier every day.

 While hosting Rachel, I had been working for a large part of her stay. Therefore, I wasn’t fully keyed into all the happenings around the house. One day when I came home, I saw a plate of cupcakes sitting on the kitchen counter. Lightly pink and topped with frosting, these cupcakes looked just like the SIBO-approved, grain- and dairy-free treats our nanny and my daughter make from time to time.

 I was hungry and so grateful for the gift. I picked one up and started eating it. The cake was crumbly. The frosting buttery. It was delicious. I was so distracted with settling back home and the other hundred things on my mind, that I didn’t give the cupcake much thought—until the realization hit me: These weren’t our usual cupcakes. They were made with good intentions, but also with so many ingredients I had worked hard to avoid, including grain, dairy and refined sugar. They were left unlabeled on the counter, which is why I mistook them as something I could eat. It was a small oversight that set me way back on my work and healing. I had a considerable flare-up that led to severe illness. I was in bed for about two days. It took another two to three weeks before I began to feel wholly myself again. 

 After I told Rachel what happened, I learned that the cupcakes were not brought by her but rather her mother. I would never have expected her mother to know my dietary restrictions, but after all the meals we had shared together in the past, I didn’t see how my friend could forget to mention something that was so important to my health. But we can never assume. Mistakes happen. People forget.

 This issue taught me why boundaries around our food choices are so critical. They need to be announced, clarified, and reminded. Not because it’s a matter of preference, but because it’s a matter of health. This issue begs the question: How do we navigate our interactions with people when our choices aren’t always compatible?

 I’ve spent a long time thinking about this. I’ve come to realize that we can’t second-guess ourselves. We can’t apologize for eating a certain way or feel like we need to defend our decisions. We can contort our needs to make others comfortable. We have to be vocal about them. As anyone who has been on the gut-healing journey can tell you, there are highs and lows, setbacks, and sacrifices. But these become harder when others interfere—even with the best intentions.  

 You expect that the one place you can eat safely to be your own home. Home is the one environment where you don’t have to remind the chef, the server, or the food runner at a restaurant of your allergy or your dietary restriction. For someone suffering from dietary issues, this can be a very vulnerable position. That is why it is so critical to have this safe place to eat—even if it’s only one shelf in your pantry. In our home, I’m clear about the necessity of food labeling and how important it is to communicate what the food is, what it contains, and that it has a correct place to be stored.

 I’m also clear about what guests can and cannot bring into our home. When I host a dinner party or have guests come to visit (pre-COVID days) I make a point to announce our strict diet rules. I tell everyone that we’re a gluten and dairy-free home, and that if they bring any food into the house, it must be labeled. And the lesson goes both ways. When I’m a guest in the homes of others, I’m very conscious of explaining my needs ahead of time.

It’s important to speak up. And it is even more important to do this without any sense of shame. That’s why I am perfectly comfortable with being the weird one—until it’s no longer weird. As a society, we will never fully accept sensitivities around food protocols until they become the norm. And it won’t be the norm until we begin talking about these more openly. 

Food and people: These two absolutes must come with boundaries and clear communication.

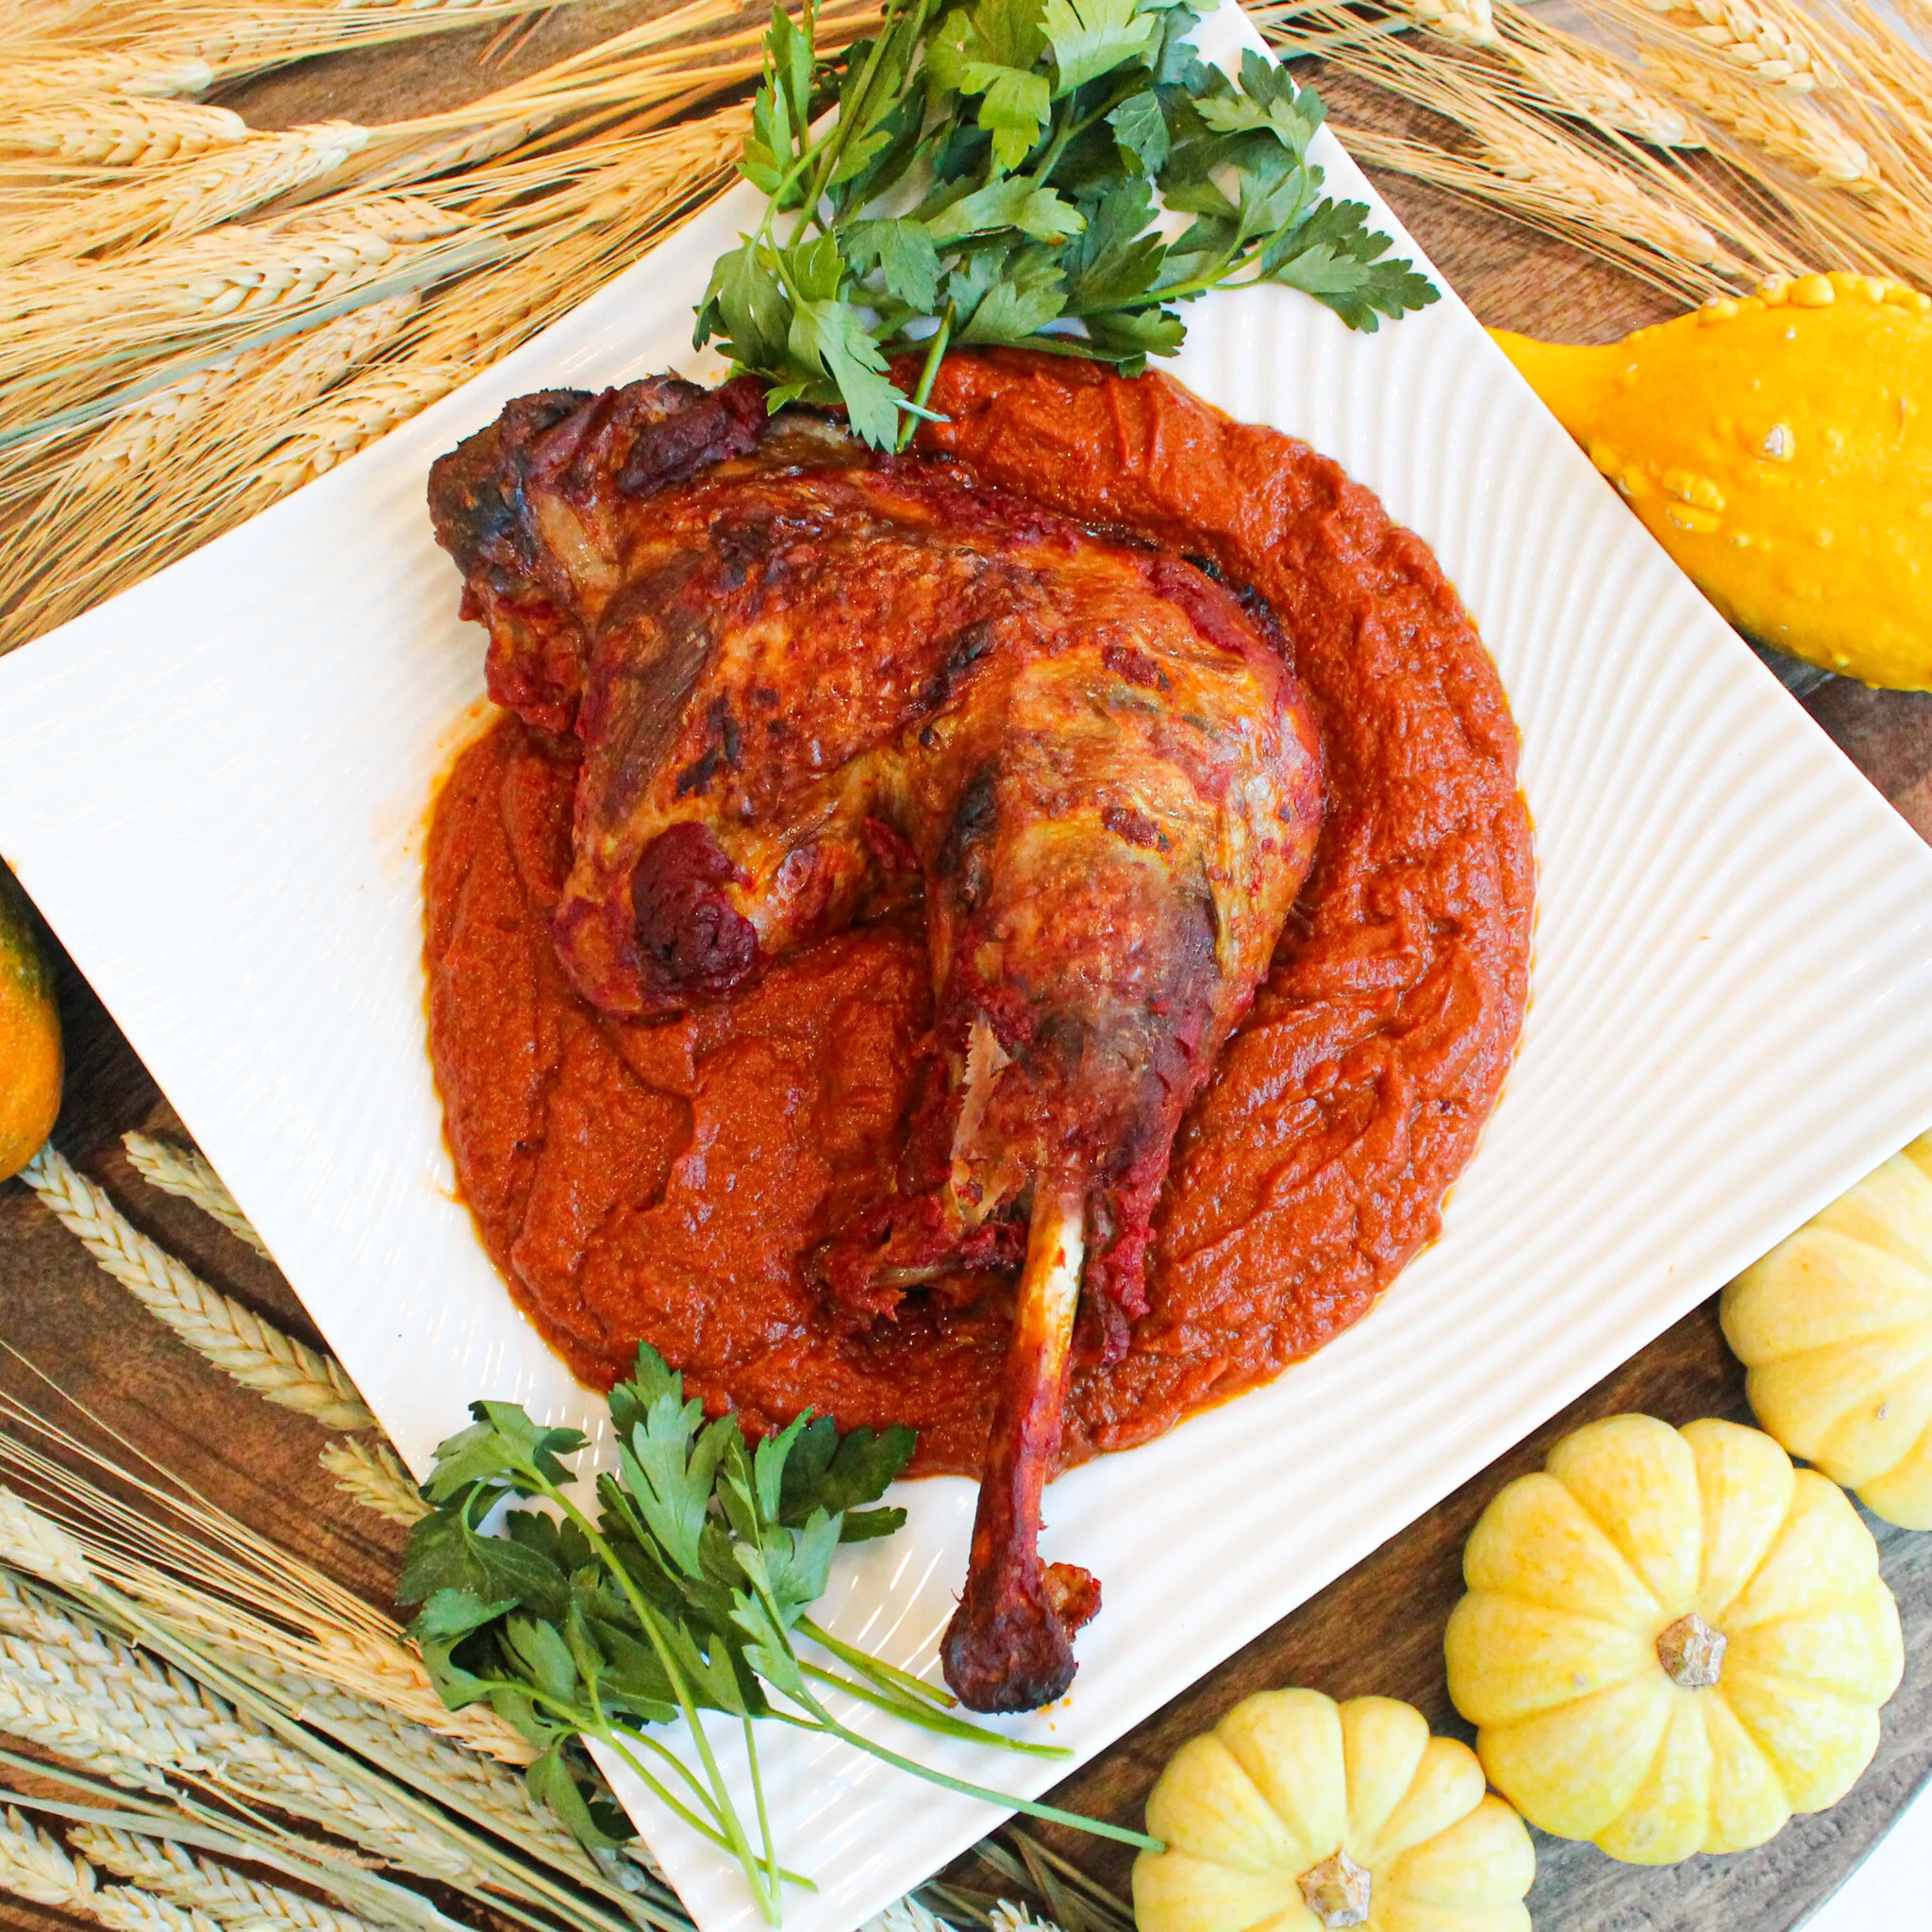
Dutch Oven Turkey Leg with Vegetable Purée

Hearty turkey paired with fall vegetables is a quintessential autumn dish, and this recipe doesn’t skimp on the comforting qualities. Using a Dutch oven results in fall-off-the-bone, melt-in-your-mouth meat.    


INGREDIENTS

  • 1 large turkey leg
  • 1-2 tablespoons ghee
  • 3 carrots
  • 2 leeks (use green part only for low-FODMAP protocols)
  • 1 zucchini
  • 1 14-ounce can tomato sauce
  • 1 cup turkey or chicken stock
  • ¼ cup apple cider vinegar
  • 1 large turkey leg
  • 1-2 tablespoons ghee
  • 3 carrots
  • 2 leeks (use green part only for low-FODMAP protocols)
  • 1 zucchini
  • 1 14-ounce can tomato sauce
  • 1 cup turkey or chicken stock
  • 60 ml apple cider vinegar

DIRECTIONS

  1. Preheat Dutch oven on medium-high heat.

  2. Pat turkey leg dry, then oil the turkey leg with ghee.

  3. Add turkey leg to the Dutch oven and brown on all sides.

  4. Remove turkey leg and set aside.

  5. In the same pan, brown the carrots and leeks together, then add zucchini.

  6. Add turkey back in, then add tomato sauce, stock, and apple cider vinegar.

  7. Cover and place in the oven at 350 degrees Fahrenheit / 175 degrees Celsius for three hours.

  8. Remove Dutch oven from oven. Take the turkey leg out and set aside on a cutting board. Pour the vegetable sauce mixture into a blender. Blend cooked vegetable mixture in Vitamix or other food processor. Add more chicken stock to achieve the desired thickness. It should look like a thick soup. 

  9. Pull turkey meat off of the bone and serve over a bowl of the blended vegetable mixture.

TIPS
**This recipe is low-FODMAP as well as SIBO friendly (see the note above about using leeks), but you can also swap out the leeks with onions if you prefer them and a SIBO protocol isn’t necessary.
**If you don’t have a Dutch oven, any heavy-bottom, deep-sided pot will work. A pan will also suffice, as long as it’s high enough to accommodate the ingredients.


Maple and Cinnamon Sweet Potato Casserole

As their name suggests, these root vegetables have a natural sweetness to them, which is enhanced when they’re cooked and blended with coconut milk and maple syrup then topped with a cinnamon pecan crunch. Creamy and comforting, this sweet casserole will make you forget the sugar-laden side dish of the past.

This recipe yields 6 servings


INGREDIENTS


  • For Sweet Potato Base:
  • 3-4 sweet potatoes
  • ½ cup coconut milk
  • ¾ cup maple syrup
  • 3 tablespoons coconut oil
  • ¼ teaspoon salt
  • ½ teaspoon vanilla
  • 2 teaspoon cinnamon
  • 1 teaspoon nutmeg
  • 2 eggs

  • For Pecan Topping:
  • 2 cups pecans
  • ¼ cup maple flakes
  • 2 tablespoons coconut oil
  • ¼ cup maple syrup
  • 2 teaspoons cinnamon
  • ¼ teaspoon sea salt

  • For Sweet Potato Base:
  • 3-4 sweet potatoes
  • 120 ml coconut milk
  • 180 ml maple syrup
  • 3 tablespoons coconut oil
  • ¼ teaspoon salt
  • ½ teaspoon vanilla
  • 2 teaspoon cinnamon
  • 1 teaspoon nutmeg
  • 2 eggs

  • For Pecan Topping:
  • 2 cups pecans
  • 32 g maple flakes
  • 2 tablespoons coconut oil
  • 60 ml maple syrup
  • 2 teaspoons cinnamon
  • ¼ teaspoon sea salt

DIRECTIONS

  1. Remove the skins of the sweet potatoes and roughly chop. Add a small amount of water to the bottom of a pot and bring to a boil. Add the sweet potatoes to a steamer basket above the boiling water and allow them to soften until they can be easily pierced with a fork.  

  2. Pour soft sweet potatoes into a Vitamix or other high-powered food processor.

  3. Add the rest of the ingredients for the base and pulse until fully combined, about 30 seconds.

  4. Smooth into a glass baking dish and set aside.

  5. Mix all the pecan topping ingredients into a bowl until well incorporated.

  6. Layer pecan topping mixture over top of the sweet potatoes. 

  7. Cover with foil and bake at 375 degrees Fahrenheit / 190 degrees Celsius for 20 minutes.

  8. Serve while hot.


TIPS

**If you do not have a high-powered blender or a food processor, a hand mixer works just as well to mix the sweet potato mixture. 

**I prefer the pecans to stay whole, but you can rough chop if desired.


Honey-Sweetened Jellied Cranberries

Cranberry sauce is such an essential part of a holiday dinner, but the additives and sugar from the store-bought versions of days past have no part on our table. Instead, I make my own, using only fruit, seasonings, honey for refined-sugar-free sweetness, and a healthy gelatin alternative.

This recipe yields 14 servings


INGREDIENTS

  • 20 ounces frozen or fresh cranberries
  • ¼ cup water
  • 1 orange juiced and grated for zest
  • ¾ cup honey
  • 1-½ teaspoons Vital Proteins beef gelatin
  • ¼ teaspoon salt
  • 1 teaspoon vanilla
  • ¼ teaspoon coriander or cinnamon (optional)
  • 20 ounces frozen or fresh cranberries
  • 60 ml water
  • 1 orange juiced and grated for zest
  • 180 ml honey
  • 1-½ teaspoons Vital Proteins beef gelatin
  • ¼ teaspoon salt
  • 1 teaspoon vanilla
  • ¼ teaspoon coriander or cinnamon (optional)

DIRECTIONS

  1. Add berries, water, and orange zest to a pot. Cover and cook on medium until berries start to soften and release their water.

  2. Mash the mixture with a masher or fork.

  3. Add 1 tablespoon orange juice and ¾ cup / 180 ml of honey.

  4. Bring mixture to a boil over medium heat. 

  5. Add gelatin and stir into mixture. Continue cooking until it thickens.

  6. Once the mixture has thickened a fair amount, pour it into a blender. Add salt, vanilla, and coriander or cinnamon (if desired). Blend on high for about 30 seconds to pulverize the cranberry seeds. 

  7. Pour mixture back into pan and continue boiling, stirring frequently, especially as it gets closer to done. Keep an eye on it during this step because the sugar from the honey will start to foam and the liquid can boil over the sides very quickly. 

  8. Cook until you can run a spatula across the bottom of the pan and it takes a few seconds to go back into place.

  9. Remove from heat and pour into a heat-proof container. 

  10. Chill in the refrigerator until you are ready to serve. 


Green Bean Casserole

Forego the canned soup and store-bought fried onions and make a healthy take on green bean casserole, that most tried-and-true of decadent vegetable side dishes. By making your own soup mixture with coconut milk and gluten-free almond flour and topping with quickly fried shallots, you have an irresistibly creamy and crispy casserole without the harmful additives.

This recipe yields 4-6 servings


INGREDIENTS

  • 12 ounces green beans
  • 2 tablespoons ghee or bacon grease, divided
  • 8 ounces mushrooms
  • ¾ cup chicken stock
  • ¼ teaspoon onion powder
  • ¼ teaspoon garlic powder
  • 1 teaspoon salt
  • ½ teaspoon pepper
  • ½ cup coconut milk
  • ¼ cup almond flour
  • 2 tablespoons arrowroot powder
  • 1 onion
  • 1 teaspoon garlic
  • 3-4 shallots
  • 12 ounces green beans
  • 2 tablespoons ghee or bacon grease, divided
  • 230 g mushrooms
  • 180 ml chicken stock
  • ¼ teaspoon onion powder
  • ¼ teaspoon garlic powder
  • 1 teaspoon salt
  • ½ teaspoon pepper
  • 130 ml coconut milk
  • 32 g almond flour
  • 2 tablespoons arrowroot powder
  • 1 onion
  • 1 teaspoon garlic
  • 3-4 shallots

DIRECTIONS

  1. Bring a pot of water to a rolling boil. Place green beans into the hot water and cook for 4 minutes. 

  2. Immediately transfer green beans to a bowl of ice water to blanch so they stop cooking. Begin to prepare the condensed cream of mushroom soup mixture.

  3. Melt 1 tablespoon ghee or bacon grease in a Dutch oven. On medium-high heat, add mushrooms and cook until they have released their moisture and begin to wilt (approximately 5 minutes).

  4. Add chicken stock, onion powder, salt, pepper and garlic powder to mushrooms and turn heat down to a simmer. 

  5. In a separate bowl, whisk together coconut milk with almond flour and arrowroot powder until it is well incorporated.

  6. Pour milk and flour mixture over mushrooms and stir until it thickens (about 1 minute).

  7. Remove cream of mushroom soup mixture from the Dutch oven and set aside. 

  8. In the same pot, melt the remainder of the ghee or bacon grease.

  9. Add onions and let soften for approximately 5 minutes.

  10. Add garlic and cook for a few minutes to allow the garlic to release its aroma.

  11. Add green beans and cream of mushroom soup mixture to the Dutch oven and stir to incorporate.

  12. Transfer to the oven and bake for 30 minutes at 375 degrees Fahrenheit / 190 degrees Celsius. 

  13. While the green beans are baking, slice shallots into rings and fry them in cooking fat until they are brown and crispy. 

  14. Remove green beans from the oven and top with a layer of crispy shallots.


TIPS

**You can make the condensed mushroom mixture and store a day or two ahead of making and assembling the green bean casserole.


Butternut Squash Soup

Summer might get the spotlight when it comes to fresh produce, but fall’s bounty should not be underestimated, especially naturally sweet butternut squash. Its smooth texture lends a luscious quality to this creamy soup, highlighting the best of autumn’s abundance. 

This recipe yields approximately 2 1/2 quarts (80 oz or .5 liters) of soup.


INGREDIENTS

  • 3 medium butternut squash
  • 1 tablespoon high-heat olive oil (or cooking fat of choice)
  • 1 tablespoon sea salt
  • 2 large yellow onions
  • 1 tablespoon ghee
  • 14 oz (½ can) of full fat coconut milk
  • 24 oz chicken bone broth
  • 1 teaspoon white pepper
  • 1 tablespoon ground sage
  • Aged balsamic vinegar for dressing, if desired

DIRECTIONS

  1. Preheat oven to 375 degrees Fahrenheit / 190 degrees Celsius.

  2. Peel and rough-chop butternut squash. Toss with olive oil or fat of choice and half of the sea salt. Place on roasting sheet and roast until golden brown. 

  3. While butternut squash is roasting, rough-chop onions.

  4. Melt ghee in Dutch oven (or stock pan) and add onions. Season onions with the rest of the salt.

  5. Sauté onions until they are just past translucent and starting to brown but not yet fully caramelized.

  6. When butternut squash is done, remove from oven and add to the Dutch oven with the onions.

  7. Add chicken bone broth until it’s just covering the top of the vegetables. Bring to a boil. Turn down and add coconut milk and let simmer for 10 minutes. 

  8. Add the white pepper and sage.

  9. Transfer to large Vitamix or food processor and blend until completely smooth. 

  10. Dress with a small drizzle of aged balsamic vinegar and serve hot.


TIPS

**Duck fat works nicely as an alternative to olive oil.

**Amounts of butternut squash or onions can be adjusted depending on what’s in your pantry. I was aiming for 2:1 butternut squash to onion ratio.

**Replace onions with leeks for a low-FODMAP version.

**I always check roasting vegetables at 20 minutes in and adjust heat or flip, based on how they look. For a more even caramelization and if you have the time, you can flip the squash to the other side.

**Leftovers make a quick, delicious breakfast. Heat for 60 seconds in a small stainless steel sauce pan on high heat, pour into mug and drink it. I actually like cold soup, as well, and love having this on hand for a quick lunch in a thermos to go.


Bolognese

Bolognese is classic Italian comfort food, and while we’ve skipped the white wine and added more tomatoes, this hearty version doesn’t skimp on flavors. Cooking the meat slow and low is the secret to creating a thick consistency and rich flavor.


INGREDIENTS

  • 1-1 ½ pounds pork or veal
  • 1-1 ½ pounds beef
  • Salt and pepper to taste
  • 1 tablespoon olive oil
  • 1 tablespoon duck or chicken fat
  • 2 bulbs fennel, finely chopped
  • 4 carrots, finely chopped
  • 4 celery sticks, finely chopped
  • 1 medium/large onion, finely chopped
  • 2 cloves garlic – minced or passed through garlic press
  • 1 28-ounce can crushed tomatoes
  • 450 - 680 g pork or veal
  • 450 - 680 g beef
  • Salt and pepper to taste
  • 1 tablespoon olive oil
  • 1 tablespoon duck or chicken fat
  • 2 bulbs fennel, finely chopped
  • 4 carrots, finely chopped
  • 4 celery sticks, finely chopped
  • 1 medium/large onion, finely chopped
  • 2 cloves garlic – minced or passed through garlic press
  • 1 28-ounce can crushed tomatoes

DIRECTIONS

  1. In a Dutch oven, brown meat with salt and pepper in oil and fat over medium heat.

  2. Remove meat from the Dutch oven, but leave fat in.

  3. Brown fennel, carrots, celery, and onion over medium heat until translucent. 

  4. Add in garlic and cook for about 30 seconds. Add salt and pepper to taste.

  5. Add crushed tomatoes and meat to the mixture and season with salt and pepper.

  6. Bring to a boil, then simmer for 1-½ hours over low heat until soft and tender.


TIPS

**Fresh tomatoes are always best, but I had canned on hand and they work just fine.

**Can be stored in freezer for 3-6 months. I keep mine beyond a year, but I think the key is preparing it properly for freezer storage. Fill 32-oz wide mouth mason jar up to just below the shoulder of the jar, then pour enough olive oil to cover the bolognese. Ensure that it does not go above the shoulder, which is the curve in the mason jar. This will provide a better seal and help prevent freezer burn. As always, be sure to label with the item and date prepared.

**For low FODMAP, SIBO-friendly version, remove celery and replace garlic and onion with the green part of 1 leek and ½ teaspoon of asafoetida.


Chef Talk: Holistic Cook and Author Hilary Boynton on Teaching Kids to Eat and Live Healthily

A healthy future starts with healthy kids, which is why empowering young people to engage in their nutrition is vital. This is huge mission for us at PrimaFoodie and one that we share with holistic health counselor and chef, Hilary Boynton. For our latest Chef Talk series, we spoke with Boynton about how we can all empower our young ones to understand our food system, engage in the kitchen, and know the ins and outs of what lands on our plates.

Read More

9 Cookbooks that Teach and Inspire

A good cookbook gets you cooking. A great cookbook gets you cooking—and thinking and discovering and coming back to the kitchen over and over. Any cookbook can be a guide in helping you make a decent meal, but a really inspiring resource stretches you. It helps you to understand the alchemy of food and the whys and hows behind delicious—emboldening you to make your own creations. 

For all of us at PrimaFoodie, a great cookbook is like having a loyal friend or mentor in the kitchen. You can hear the author’s voice offering wisdom about the culture behind the spices, the chemistry of the salt and heat, and the history for using certain methods. The pages offer more than step-by-step instruction. They offer the best counsel for becoming a better cook. 

These nine cookbooks do just that. With their oil-stained, dog-eared pages, we reach for these when we need a quick gut-check (400° or 425°? Coconut or olive oil?) or inspiration to try something new. 

Where Cooking Begins

By Carla Lalli Music

This technically is a cookbook (a great one), but it’s also a way to hang out with Carla Lalli Music, the hilarious long-time chef and editor-at-large for Bon Appetit. Music makes cooking fun. (Just watch one of her cooking videos and you’ll see.) She also makes it super inclusive. Every one of the comforting recipes in her book comes with a “spin it” list that offers various alternatives—meaning, if you want to swap beef for chicken, or a gluten-free starch for wheat, go for it. This is such a fun resource that proves there doesn’t need to be any perfection in cooking, only the permission to go with what feels right. 

Small Victories

By Julia Turshen

For years, Julia Turshen was the skillful co-author and co-chef behind so many fantastic cooking endeavors, including the making of Gwyneth Paltrow’s book, My Father’s Daughter. Finally, in 2016, she came out with her first cookbook entirely of her own: Small Victories. (Since she’s followed with several more.) This lovely resource layers healthy recipes with comforting spins and helpful tips. Throughout, Turshen offers bits of wisdom and lessons she’s learned in the kitchen along the way. When we’re looking to make a simple, comforting dish, this is one of the first we pull from the shelves. 

Sweet Laurel: Recipes for Whole Food, Grain-Free Desserts

By Laurel Gallucci and Claire Thomas

This bakery, based in Pacific Palisades, California, has gained a sort of cult following for their grain-free, sugar-free, additive-free baked goods. The treats—cakes, breads, cookies, muffins, scones, crackers—are incredible, even when compared to any conventional desserts. But the story goes much deeper. Longtime baker Laurel Gallucci started experimenting with alternative flours and whole ingredients after she was diagnosed with autoimmune conditions. Her recipes quickly took off. She teamed with friend and photographer, Claire Thomas, and the two brought the Sweet Laurel brand to life. This book unveils it all—the journey, the secrets, the whole ingredients—and proves ever-the-more that delicious and satisfying doesn’t require anything artificial. 

Ottolenghi: The Cookbook

By Yotam Ottolenghi and Sam Tamimi

Yotam Ottolenghi and Sami Tamimi—who were both born in Jerusalem and lived in Tel Aviv—met while working at a bakery in London. The two instantly connected over a love of foods from their native lands and a confusion for traditional English fare. Their kinship grew and eventually the two opened the coveted Ottolenghi deli in London, which has grown into six delis and restaurants throughout London. Their food is unparalleled: super fresh, nothing artificial, organic, and heavily influenced by the Mediterranean. Every recipe here pleases for a cozy weeknight meal or a dinner party. 

Practical Paleo

By Diane Sanfillippo

Our founder, Nichole, taught herself how to cook Paleo with this cookbook when she started following the diet out of necessity. Certified nutritionist Diane Sanfillippo unpacks the Paleo diet in this New York Times bestseller in such a dense yet approachable way. And thank goodness that she does, because Practical Paleo is one of the few available resources that truly explains the whys and hows behind the diet, and the ways in which it can lead to healing and better health. Sanfillippo also offers more than 150 recipes and various meals plans that are catered to different health conditions, from brain health to liver detox. What we most love about this cookbook are its simple recipes. The fiery jalapeño buffalo burgers with sweet potato pancake "buns" and zucchini pancakes are favorites. 

Good + Simple 

By Jasmine Hemsley and Melissa Hemsley

Food writers and clean-eating advocates Jasmine and Melissa Hemsley have become well known over the past several years for their nutrient dense recipes and fun approach to healthy cooking. The sisters have authored several cookbooks together, including their best-selling premier, The Art of Eating Well, as well as a few titles on their own. Each is excellent, but we especially love Good + Simple. Offering a more accessible take on the sisters’ love for grain- and sugar-free cooking, Good + Simple offers a bunch of healthy, easy meals that can be altered according to any dietary need. What Nichole particularly loves is the Hemsley sisters’ varied palette. Their quick sausage ragu with celeriac spaghetti is a family favorite. 

Flavor Flours

By Alice Medrich

This cookbook expands the way we look at baking. Pushing wheat out of the conversation, it offers a primer on how to incorporate various alternative flours, from those made from ancient grains to others made from nuts, rice, or coconut (and more). It helps to get you more comfortable and nimble in the kitchen, giving you information on the different flour structures and textures so you know what to use and when. Every recipe Nichole has made from this book has come out beautifully. One PrimaFoodie favorite, The Queen of the Nile, is an elegant and simple chocolate cake that always impresses at a dinner party. 

Every Last Crumb

By Brittany Angell

These recipes are exquisite. Fluffy blueberry pancakes, calzones, soft plantain tortillas, cinnamon rolls—we could go on. There are so many, and every one is entirely gluten-free. Some of the recipes are more complicated or require multiple steps, but each one is entirely worth it. 

My Paleo Patisserie

By Jenni Hulet

This book is filled with beautiful photography, and recipes for delicious baked goods, including desserts and savory pastries. Entirely self-taught, Jenni Hulet  has figured out how to make some absolutely delicious grain and dairy-free versions of timeless hits, such as popovers and tarts. She also lays out the technical aspects of baking in an easy-to-understand format. At the end, she includes great tools, charts, and step-by-step instructional photos. Her basic chocolate cake is a recipe to always have in your back pocket.


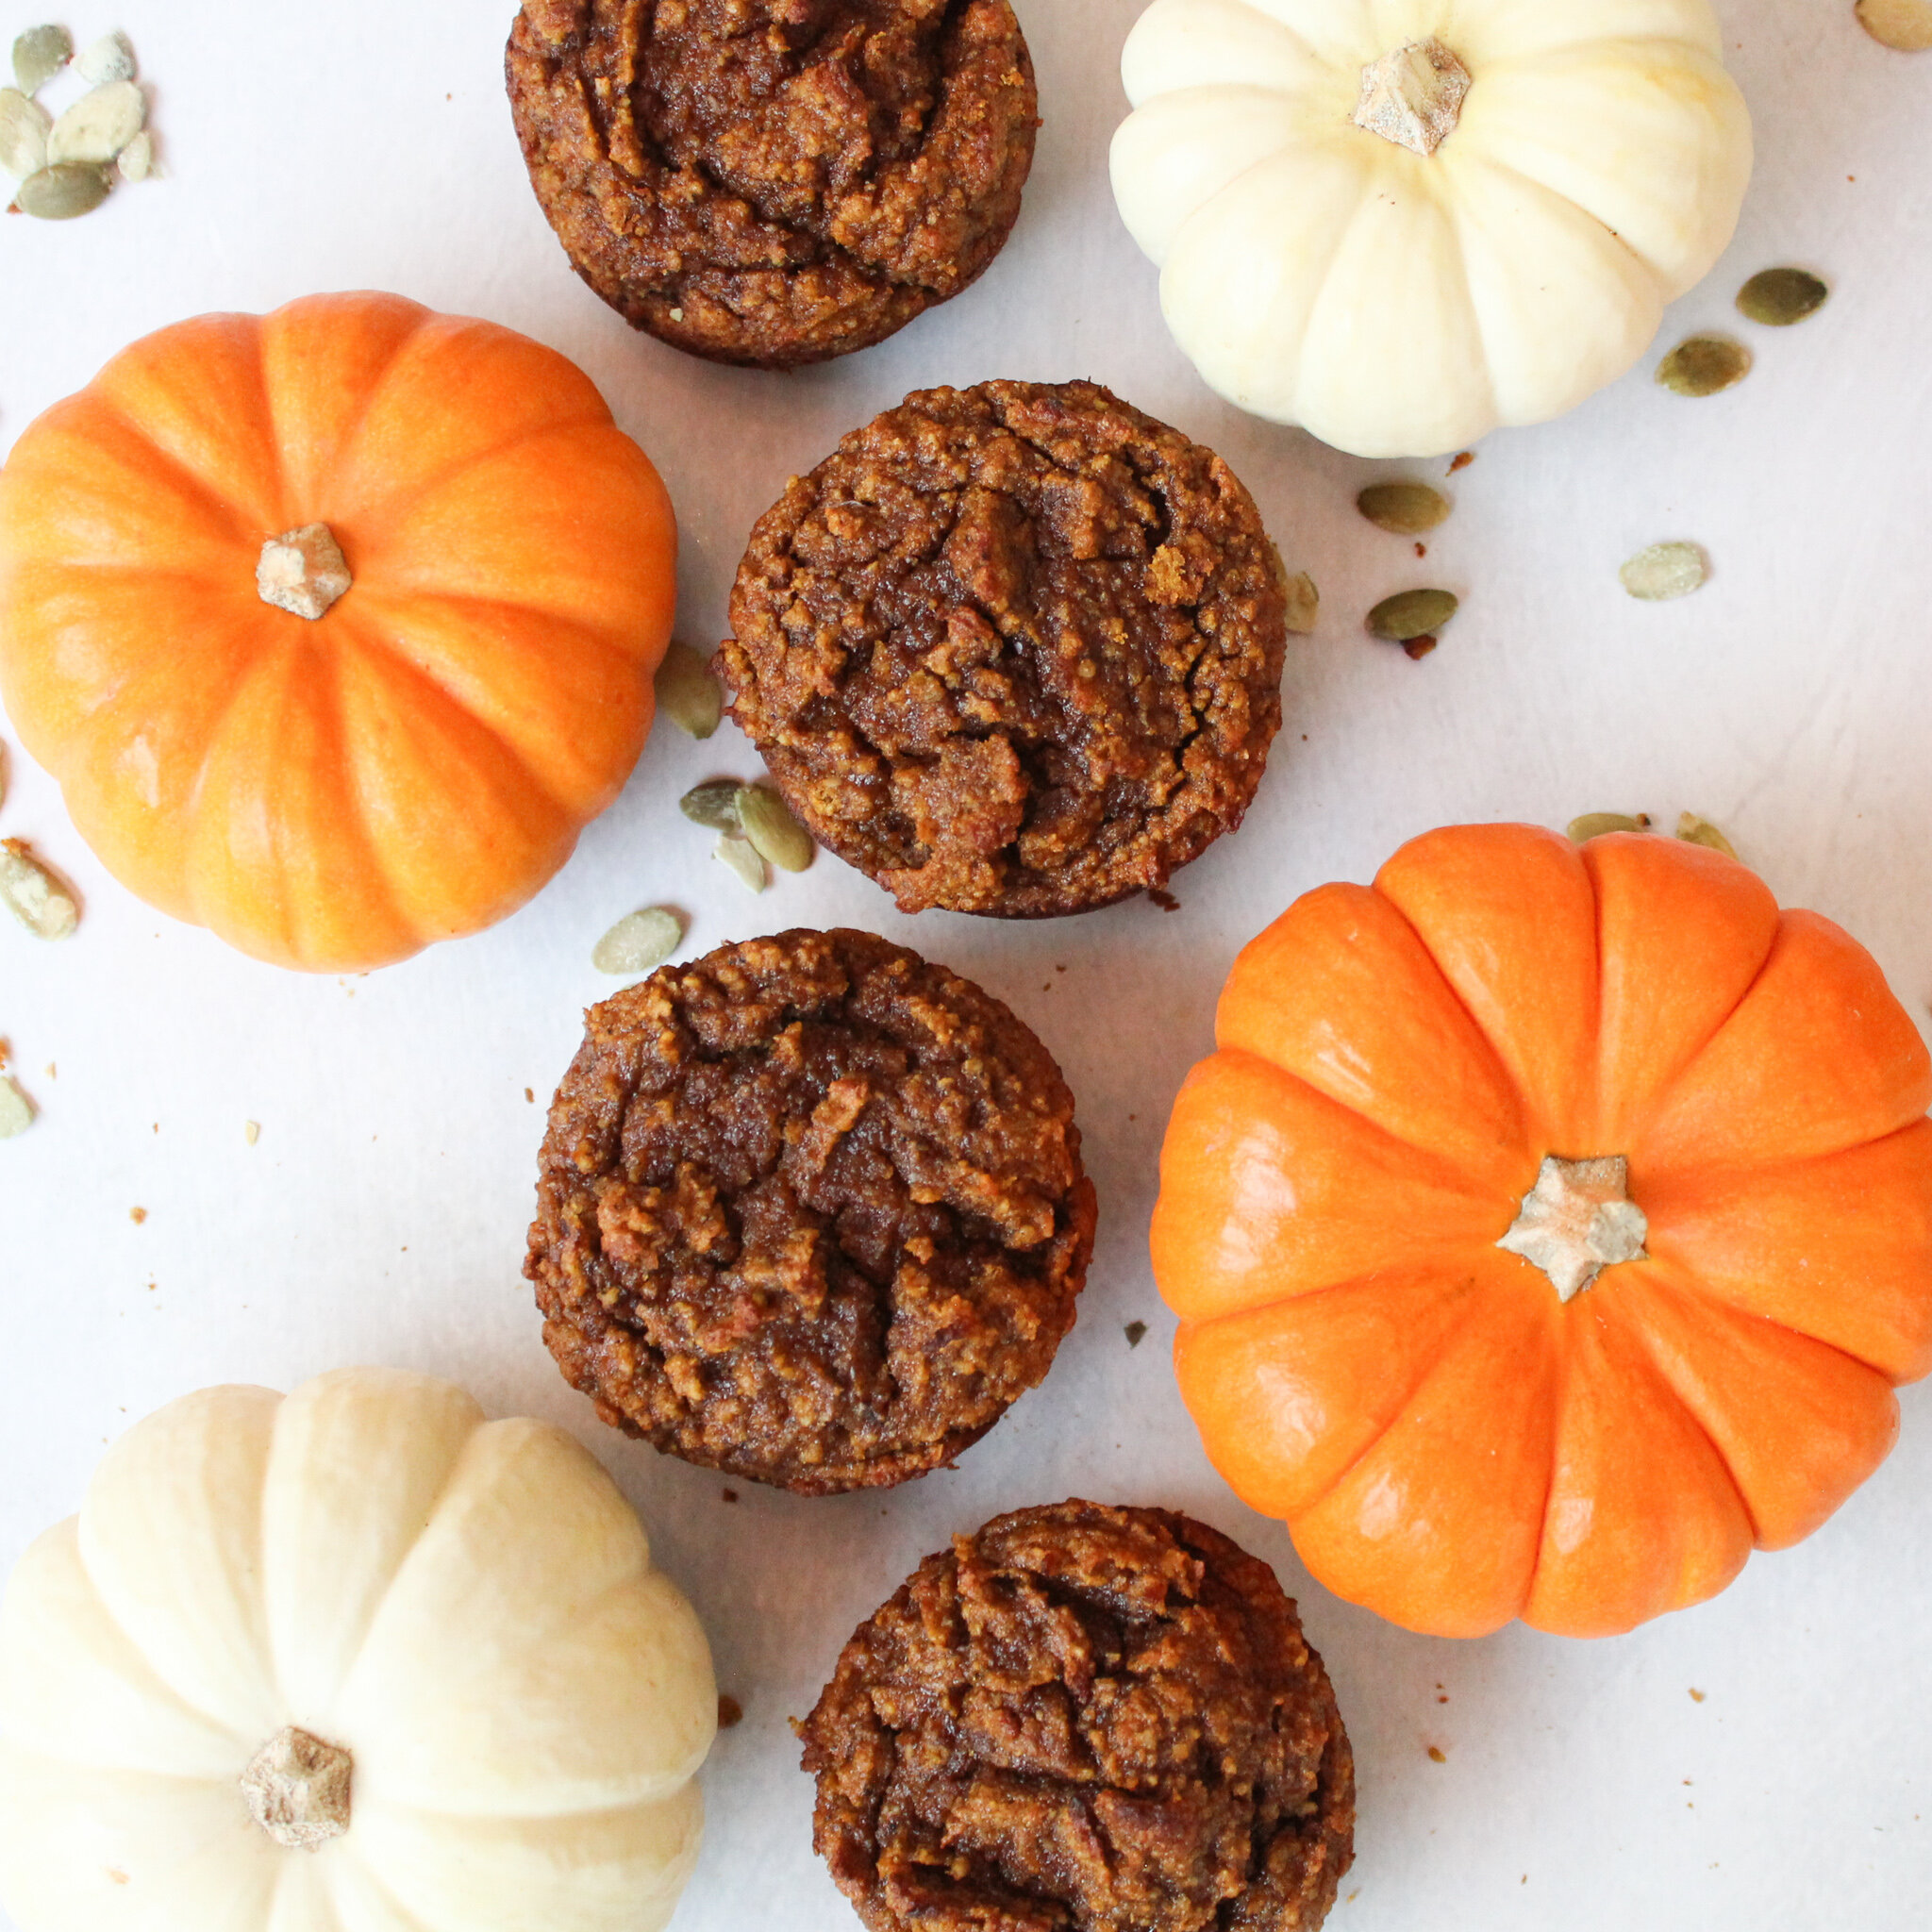
Pumpkin Muffins

It’s autumn, which means pumpkin-flavored everything. But instead of reaching for the artificial flavoring, opt for using the real thing. The plump orange winter squash is low in calories but nutrient dense, offering a healthy dose of beta carotene, fiber, potassium, and vitamin C. Plus, it’s delicious baked in these muffins, which boast plenty of warming spices to satisfy your every fall-induced flavor desire.


INGREDIENTS

  • ½ cup coconut sugar
  • 2-¼ cups almond flour
  • 2 tablespoons arrowroot powder
  • 2 tablespoons coconut flour
  • 3 teaspoons cinnamon
  • 1 teaspoon nutmeg
  • 1 teaspoon cloves
  • ½ teaspoon ginger
  • ½ teaspoon salt
  • ½ teaspoon baking soda
  • 3 eggs
  • 1 can pumpkin
  • ½ cup maple syrup
  • 1 teaspoon vanilla
  • 64 g coconut sugar
  • 290 g almond flour
  • 2 tablespoons arrowroot powder
  • 2 tablespoons coconut flour
  • 3 teaspoons cinnamon
  • 1 teaspoon nutmeg
  • 1 teaspoon cloves
  • ½ teaspoon ginger
  • ½ teaspoon salt
  • ½ teaspoon baking soda
  • 3 eggs
  • 1 can pumpkin
  • 120 ml maple syrup
  • 1 teaspoon vanilla

DIRECTIONS

  1. In a medium-sized bowl, mix all the dry ingredients. 

  2. In a separate bowl, whisk together eggs, pumpkin, maple syrup, and vanilla.

  3. Pour the wet mixture into the bowl with the dry ingredients and whisk together until all the ingredients are well incorporated. 

  4. Scoop evenly into a non-stick muffin pan. 

  5. Bake at 375 degrees Fahrenheit / 190 degrees Celsius for 20 minutes.

Delicata Squash and Sausage Pizza with Fresh Arugula

Everyone loves pizza. It feels indulgent even when it’s healthy. Such is the case with this easy-to-create gluten- and dairy-free version, which is packed full of flavor and nutrients thanks to the savory sauce, seasonal squash, and fresh arugula on top. Plus, there’s something so satisfying about making your own pizza at home.


INGREDIENTS


  • For Crust:
  • 2¼ cups almond flour
  • 2 tablespoons arrowroot powder
  • 1 teaspoon salt
  • ½ teaspoon pepper
  • ½ teaspoon baking soda
  • ½ teaspoon rosemary
  • ½ teaspoon thyme
  • ½ teaspoon oregano
  • 3 eggs
  • ¼ cup olive oil

  • For Sauce:
  • 1 medium red bell pepper
  • 1 clove of garlic
  • ½ cup olive oil
  • ½ cup almonds
  • ¼ cup crushed canned or fresh tomatoes
  • 2 tablespoons apple cider vinegar
  • 2 tablespoons parsley
  • 1 teaspoon paprika
  • ½ teaspoon cayenne pepper
  • Salt and pepper to taste

  • For Toppings:
  • 1 tablespoon olive oil
  • 1 medium delicata squash
  • ½ red onion
  • ½ red onion
  • Arugula

  • For Crust:
  • 290 g cups almond flour
  • 2 tablespoons arrowroot powder
  • 1 teaspoon salt
  • ½ teaspoon pepper
  • ½ teaspoon baking soda
  • ½ teaspoon rosemary
  • ½ teaspoon thyme
  • ½ teaspoon oregano
  • 3 eggs
  • 60 ml olive oil

  • For Sauce:
  • 1 medium red bell pepper
  • 1 clove of garlic
  • 120 ml olive oil
  • 64 g almonds
  • 32 g crushed canned or fresh tomatoes
  • 2 tablespoons apple cider vinegar
  • 2 tablespoons parsley
  • 1 teaspoon paprika
  • ½ teaspoon cayenne pepper
  • Salt and pepper to taste

  • For Toppings:
  • 1 tablespoon olive oil
  • 1 medium delicata squash
  • ½ red onion
  • ½ red onion
  • Arugula

INGREDIENTS

For Crust: 

2-¼ cups almond flour
2 tablespoons arrowroot powder
1 teaspoon salt
½ teaspoon pepper
½ teaspoon baking soda
½  teaspoon rosemary
½ teaspoon thyme
½  teaspoon oregano
3 eggs
¼ cup olive oil 

For Sauce:

1 medium red bell pepper
1 clove of garlic
½ cup olive oil
½ cup almonds
¼ cup crushed canned or fresh tomatoes 
2 tablespoons apple cider vinegar 
2 tablespoons parsley
1 teaspoon paprika
½ teaspoon cayenne pepper
Salt and pepper to taste

For Toppings:

1 tablespoon olive oil
1 medium delicata squash
½ red onion
Sausage 
Arugula 


DIRECTIONS

For Crust: 

  1. Add all dry ingredients into a mixing bowl.

  2. In a separate bowl, combine the eggs and olive oil and whisk until frothy.

  3. Slowly pour the wet mixture into the dry ingredients, folding it in with a spatula until it is completely incorporated. 

  4. Place the dough onto a piece of parchment paper, adding another piece of parchment paper on top. Using a rolling pin, roll the dough out until it is ¼-inch / .6-cm thick. 

  5. Place on a pizza stone or a tray and bake at 350 degrees Fahrenheit / 175 degrees Celsius for 10-15 minutes.

  6. Remove crust from the oven, add sauce and toppings of choice. 

For Sauce:

  1. Add all ingredients into a high-power food processor. 

  2. Blend and add additional olive oil as necessary until the sauce is smooth.

For Toppings: 

  1. Heat olive oil in a large skillet.

  2. Add delicata squash and cook until golden brown on both sides. Set aside.

  3. Add red onion to the pan and cook until caramelized. This step should only take a few minutes. Set aside.

  4. Add sausage and cook until thoroughly browned. Set aside.

For Pizza:

  1. Spread a thin layer of Romesco sauce on the baked pizza crust.

  2. Layer cooked squash, onion, and sausage mixture.

  3. Cook for 10-15 min in the oven at 350 degrees Fahrenheit / 175 degrees Celsius. 

  4. Serve right out of the oven topped with some fresh arugula.

Romesco Sauce

Romesco sauce is a versatile staple to keep on hand. The red bell pepper, garlic, almonds, and cayenne marry together to create a rich, layered flavor. It adds a brightness to vegetables and meats, and also makes for a hearty pizza sauce.

This recipe yields 8oz


INGREDIENTS

  • 1 medium red bell pepper
  • 1 clove of garlic
  • ½ cup Primal Kitchen Organic Extra Virgin Olive Oil
  • ½ cup almonds
  • ¼ cup crushed canned or fresh tomatoes
  • 2 tablespoons apple cider vinegar
  • 2 tablespoons parsley
  • 1 teaspoon paprika
  • ½ teaspoon cayenne pepper
  • Salt and pepper to taste
  • 1 medium red bell pepper
  • 1 clove of garlic
  • 120 ml Primal Kitchen Organic Extra Virgin Olive Oil
  • 64 g almonds
  • 32 g crushed canned or fresh tomatoes
  • 2 tablespoons apple cider vinegar
  • 2 tablespoons parsley
  • 1 teaspoon paprika
  • ½ teaspoon cayenne pepper
  • Salt and pepper to taste

Directions

  1. Add all ingredients into a high-power food processor. 

  2. Blend and add additional olive oil as necessary until the sauce is smooth.

Composting Can Be Easy—Here’s How to Get Started

By Julia Hirsch

I have a confession to make: I have never composted. City living is no excuse. I have city friends who save scraps in their freezer or compost in a bankers box under a couch. Many cities (New York City and Portland, for example) have composting programs, with drop off sites and compost bins collected by the sanitation department.

With a little outdoor space, the process can be even more straight-forward. For a glimpse of idyllic country composting, I have a friend who saves her scraps in an open bowl on the kitchen counter, then flings them out to her chickens every afternoon. For those of us who don’t have a gaggle of chickens, composting can still be a simple and accessible process. For the first time, I have some outdoor space, so I am ready to try. 

But first: Why should we compost? Doesn’t it all just break down in a landfill?

In the US, food waste accounts for the largest category of materials that take up landfill space. Not only does it occupy valuable space and require resources to transport, but it also breaks down without access to oxygen. When this happens, it produces methane, a harmful greenhouse gas that contributes to global warming.

When we compost at home, that decomposition process can be harnessed to produce humus, a nutrient rich, organic fertilizer. Humus enriches the soil, facilitating a biodynamic process that retains moisture, cultivates beneficial bacteria and fungi, balances the pH of your soil, and suppresses plant disease. In fact, composting can actually help combat the effects of climate change. According to the EPA, an increase in just one percent of organic matter in the soil can triple the soils water retention capacity, reducing erosion. So, every little bit helps. 

Getting Started

First, you’ll need a place to collect your food scraps, and a container in which to compost. For my mission, I wanted to keep it as sustainable as possible, which meant no new purchases. For the scraps, this can be as simple as a staked-out pile with chicken wire, or as complex as a multi-step tumbling system. I was lucky enough to locate an antique diaper bin for a kitchen collector: a metal bucket with a tight lid. So far it has done the job keeping odors out. For the compost bin, I found an old trash can and poked holes in the bottom and sides to welcome the essential oxygen (and worms, should they decide to contribute). For extra credit, I can rotate the compost with a pitchfork as it begins to decompose, or strap the lid on and roll the can around the yard.

Now, if you want to simplify the process further and purchase your gear, there are many streamlined bins available that you can put on your counter, if you’re composting inside. (Many of these have anti-odor features.) If you’re doing so outside, consider a heftier compost bin or barrel.   

Getting Composting

The process is simple alchemy. You’ll need a combination of brown waste (dry yard scraps, cardboard, dead leaves, shredded paper), green waste (grass clippings, fruit and vegetable scraps, eggshells, coffee grounds, tea leaves), water, and air.*

Combine equal parts brown waste and green waste. The brown scraps provide carbon, while the green waste supplies nitrogen.

Add water to moisten the mixture. This allows for the organisms to digest and move. And make sure there is a little airflow. Exposure to oxygen ensures the organisms break down the materials in a way that rids any terrible odors. Now, your compost is ready to brew.

I am looking forward to seeing how this experiment goes. By the spring, maybe there will be enough compost to start a small garden. 

Wishing you the best in your composting journey. Start small and see where it goes.

A Few Helpful Notes: 

·   Be sure to avoid composting any dairy, bones, fats, oils, and pet waste as these materials can attract vermin or contain harmful bacteria.

·   For a full list of items to compost (and to avoid), see this EPA Guide.

·   There are a few helpful composting resources that offer specific step-by-step guidance. These include: Rodale Institute’s Backyard Composting Cheatsheet, Modern Farmer’s 7 Secrets to Perfect Compost, Compost Junkie, and the New York Times Step-by-Step guide.


What's the Deal With Bone Broth?

Consuming broth is an ancient tradition found across many different cultures. Bone broth specifically has gained popularity in recent years, and for good reason. Today, many tout this nutrient dense broth, which is made by slowly simmering animal bones, for helping to reduce inflammation, heal the gut, increase joint health, and improve sleep. As the bones and connective tissue cook down, they release minerals, essential fatty acids, collagen, vitamins A and K, and other vital nutrients into the water, transforming it into a "liquid gold” superfood. (In truth, bone broth is more of hearty stock than a broth.)  

A cup of bone broth with a squeeze of lemon and a pinch of sea salt is a hydrating and healing way to start the day. To maximize health benefits, it’s best to consume bone broth on an empty stomach. While filling enough to be consumed on its own, bone broth can also be used as a foundational building block for other recipes. I like to use it as a base for my favorite soups, or as a way to add rich flavor to grains and steamed vegetables.

While high quality, pure bone broths are becoming easier to find, I advocate for making your own. It’s surprisingly easy, and makes for a sustainable way to use leftover bones and vegetable scraps.

How to Make Bone Broth

Gather the goods. A flavorful, rich bone broth is made simply from bones and water. I also often add herbs and vegetable scraps for added flavor and nutrients. Rather than throw away bones, I store them in bags marked “Chicken,” “Beef,” or “Pork,” in my freezer.  If you need bones, ask your local butcher for stock bones, or chicken feet, necks, and backs. These parts of the chicken are often quite high in cartilage, which make for a rich stock. [While using previously roasted bones adds flavor to your broth, it is not necessary to roast or blanch the bones beforehand.] I also keep a bag of vegetable scraps in my freezer. (Carrots, onions, and celery make for great stock, but more sulfurous vegetables like broccoli and kale tend to add a strange flavor.) You can also rescue wilted vegetables from your weekly fridge clean.

Set your simmer. I usually make one type of broth per month, either from the bones of chicken, pork, or beef. When one of my freezer bags is full, I start the simmering process. Fill a large pot with your bones and enough water to fully submerge everything. Bring to a boil and skim the white foam (impurities) that rises to the surface. Add vegetables and herbs and lower to a very gentle simmer. If you boil your stock for too long, you will effectively pasteurize it, killing beneficial enzymes. The simmering process is long to allow the bones to release the maximum amount of nutrients. Chicken usually takes 24-36 hours, Beef simmers for 48-72 hours. Wait until you have a gelatinous, liquid gold.

Strain your stock. Once your bone broth has reached the appropriate consistency, it’s time to strain and store. I use a three-step straining system, which yields a smooth, velvety liquid. Allow your broth to cool [enough to handle safely], then place the pot in or near the sink. Using a spoon or a scoop, remove the bones and scraps. Then, using a strainer, pour your stock into a large bowl. I use a gravy strainer for the final step, pouring the liquid from the bowl into a series of Mason jars. Be sure not to fill the jars above the shoulder (where the jar begins to curve) as the liquid will expand as it freezes. I label and date each one, store them in the refrigerator if they need further cooling, or directly in the freezer for long term storage.

There are many ways to experiment with your bone broth. I often add a tablespoon of collagen and various spices to add nutrition and zest. One of my favorite sources for broth recipes is Craig Fear, of Fearless Eating. I encourage you to experiment with your own cup of “liquid gold,” and note how your body feels after you develop this healthy habit. It is important to note that while bone broth is especially healing for the gut, it’s not recommended if you are adhering to a SIBO diet. The bone broth can be made without cartilage, but it is a cumbersome process, and less delicious, so perhaps wait until you have healed enough to incorporate cartilage into your diet.